Introduction
Twine is the tool that we will use to build our narrative game. It is designed to make it easy to develop Interactive Fiction experiences without the need for any programming. As it happens there is an underlying programming language – so if we wish we can extend our Twine project in almost any way imaginable!
The most recent version of Twine allows you to build your games entirely online. There is no need to download or install anything to your PC. This means it will even work from your tablet.
Let’s begin
So let’s navigate to the Twine website
There is lots of useful content to explore here. Feel free to have a read and when you’re ready click on the ‘use it online’ link.
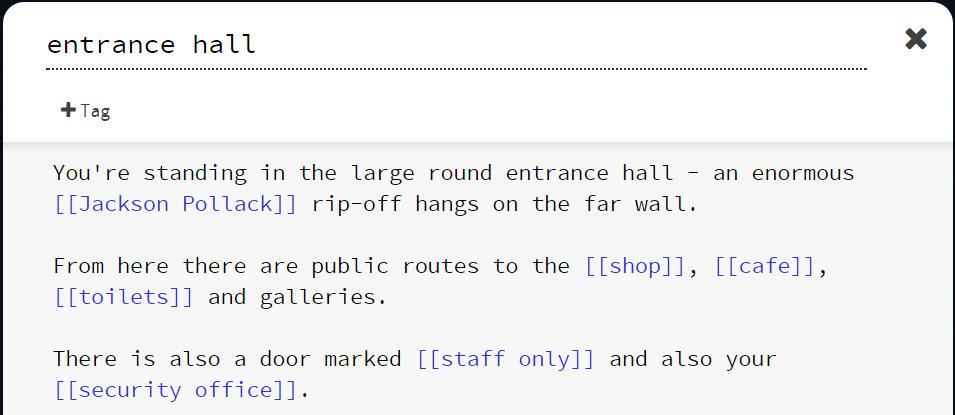
A Twine game consists of individual ‘passages’ that have links connecting them. Passages can be thought of as individual web pages and are used to represent individual locations or story sections. The links (relationships) allow you to move between the passages. By the end of this session you’ll produce a game that in the browser that has individual passages that look something like this:
The player is able to direct the experience by clicking on the blue hyperlinks.
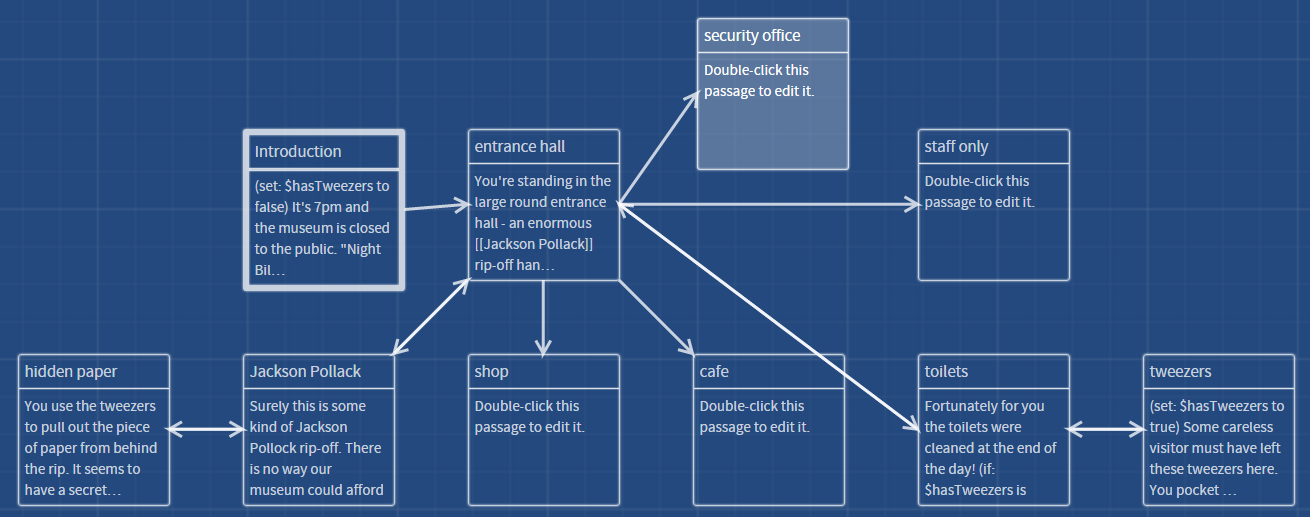
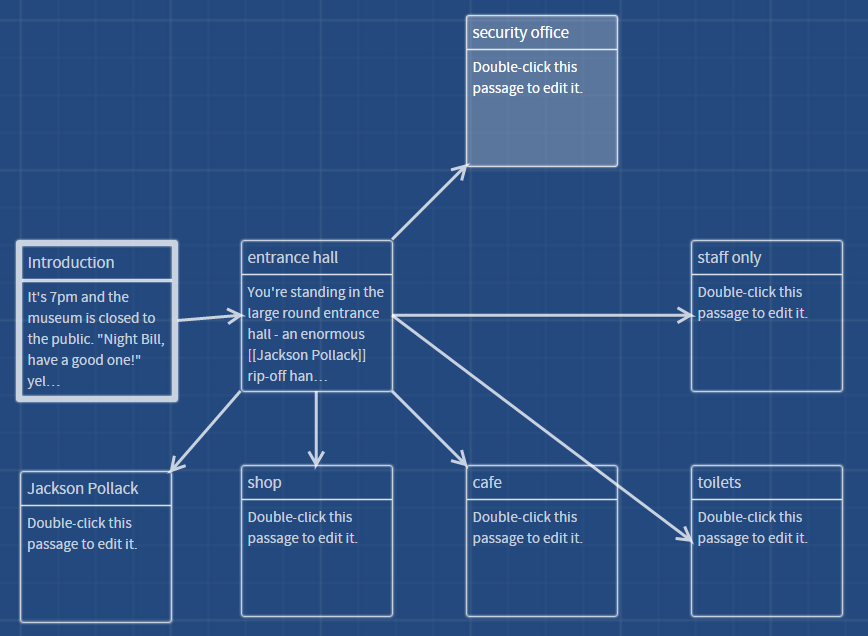
In order to create this narrative game – behind the scenes you will be building a ‘Story Map’ that will look similar to this:
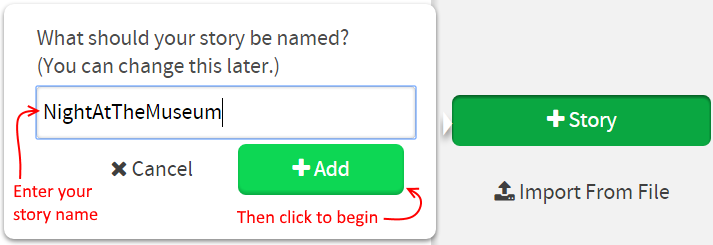
Create your first Story
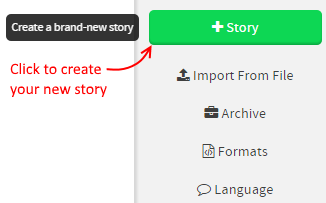
From the menu on the left create a brand new story.
Enter a name for your new story. I’m sure you can think of something more unique than NightAtTheMuseum:
Passages
A Twine story is comprised of passages. Each passage is a block of text with links to other passages. Later we’ll add images to passages and even a small amount of code.
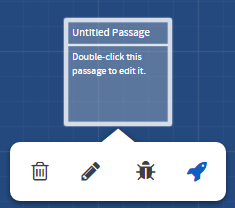
Let’s begin by adding our first passage. Double click the ‘Untitled Passage’
In the popup window change the ‘title’ to ‘Introduction’. Then you can add any text relevant to your story. This is the Introduction though so the text should probably introduce your story
Here’s my version – I’m sure you can come up with something more creative:
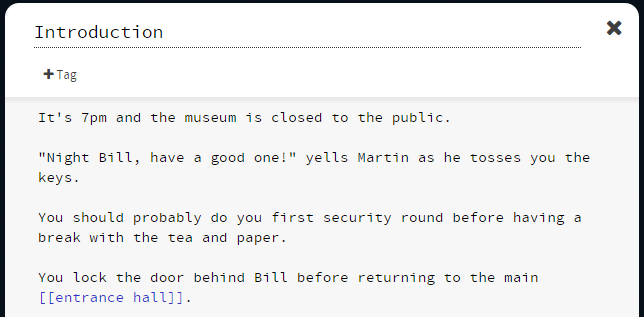
The key part to note is that around entrance hall I’ve added two square brackets either side.
The [[entrance hall]] is a hook. It will become a link that the player can click on and will take them to another passage.
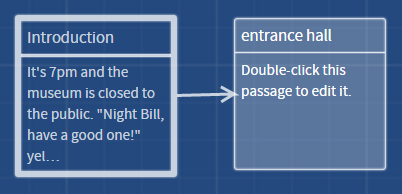
When you close the ‘Introduction’ passage and return to the ‘story map’ you’ll see that it has automatically created you a new passage called ‘entrance hall’.
It’s usually a good idea to test as you go along. You can use either the ‘Test’ or ‘Play’ buttons from the bottom right of the screen.

They do almost the same – the ‘Test’ will show slightly more information when you play the game, whereas ‘Play’ is exactly what your players will see. Both of these will have opened in a new tab – so once you’re finished testing locate your original Twine tab in order to continue development.
You can double-click on the ‘entrance hall’ passage and repeat the process of adding some text. This will allow you to add a number of locations to move between. You should assume that we won’t return to the ‘Introduction’ passage at any point. This is important as we will be using the ‘Introduction’ passage as a place to initialise the game – so we don’t want to return there for fear of reinitialising the game during play.
Note: technically the passages don’t need to be physical locations – but while learning the ropes having each passage refer to a separate room is probably a good idea.
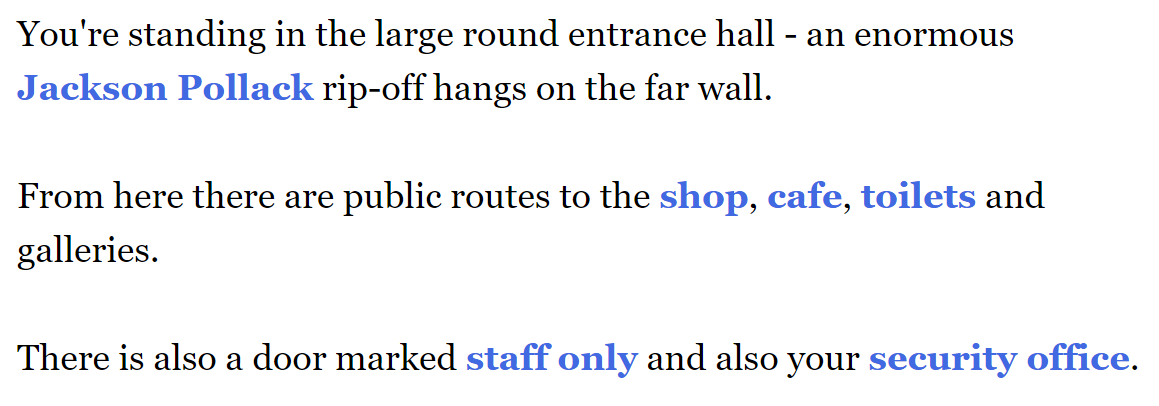
My ‘entrance hall’ passage looks like this. I’ve added 5 new locations: shop, café, toilets, staff only area and a security office. You can also examine the painting on the wall.
When we return to the ‘Story Map’ we will see that once again it has automatically created all the passage place-holders for me. So now there is lots of text to fill in and probably more locations to create.
So it’s possible to use your knowledge to build either a linear or non-linear story. Go ahead and begin to flesh out your game. Once you’ve got a world you can navigate around then you might want to begin to add player actions.
###
Adding some actions
The easiest actions that we can add are those associated with an object (also known as a pickup).
Let’s add a simple one. In my case, having a closer look at the picture reveals a small tear in the corner. Inside this tear appears to be a folded piece of paper. In order to extract the paper we’ll need an implement of some kind such as a pair of tweezers. We will place some tweezers on the sink in the toilets for our player to find.
In order to make this work requires several steps:
- (Intro) Need a new variable that records whether the player has any tweezers
- (Toilets) We need to place the tweezers in the toilets.
- (Toilets) We need to allow them to be picked up (and remember when they are removed from the toilets).
- (Pollock) If the player has tweezers then they should be able to remove and read the paper.
- (Pollock) We can also suggest when looking at the picture that tweezers might be useful.
For the sack of simplicity we will read the paper and then always return it to where it came from.
- Add a variable to Introduction passage
We will always initialise variables at the beginning of the game so we’ll place this at the top of the Introduction passage. Our variable will be called hasTweezers. It is a Boolean variable (meaning it only ever has the value true or false). To begin with it will be false since the player does not have the tweezers).
Add the line at the very beginning of the Introduction passage.
(set: $hasTweezers to false)
- Add the tweezers to the toilet passage. If we don’t have the tweezers in our possession then they must be in the toilet.
(if: $hasTweezers is false)[There are a set of [[tweezers]] resting on the edge of the sink]
- Pick up tweezers. I need a new ‘tweezer’ passage. This passage explains to the player that they are picking up the tweezers – it also sets our hasTweezers variable to true.
      (set: $hasTweezers to true)</p>

      Some careless visitor must have left these tweezers here.
      You pocket the tweezers with the intention of putting them in Lost Property later.

      You return to the [[toilets]]
Note: when we return to the toilet passage we will see that the Tweezer hook is now missing – so we can’t pick them up a second time.
- If the player has tweezers then they can read the paper. Add this to the ‘Jackson Pollock’ passage.
(if: $hasTweezers)[You can use tweezers to extract the [[hidden paper]] from the tear.]
- Suggest that tweezers would be useful if they didn’t have them. We can use an else clause – immediately after the if one.
(else:)[If you had some tweezers it might be possible to extract the piece of paper.]
Save your work
As you would have seen in the warning messages – all your work is actually being ‘saved’ in your local web browsers cache. This means if you clear you cache or move to a different browser / machine then you won’t be able to continue working.
In order to keep your story you’ll need to archive the work.
The archive option can be found on the main page. Click the home icon to return there.
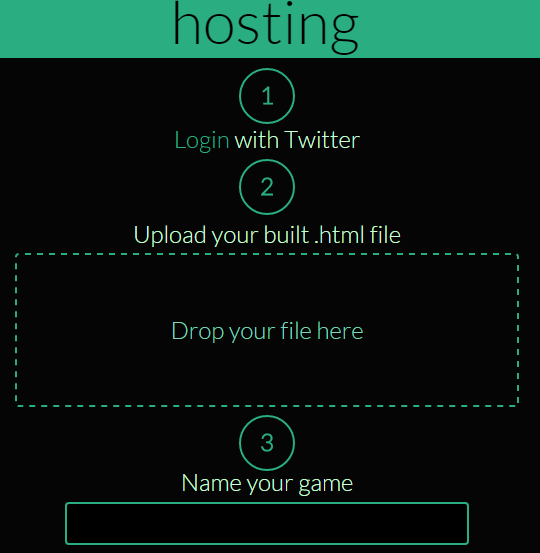
Host your game online (for free!)
  NOTE: Since I orginally wrote this tutorial - philome.la no longer accepts uploads.
  I need to find an alternative to replace this.
Once you’re ready to share your creation with the world you’ll need to find somewhere online to host it.
Philomela provide free hosting (providing you have a twitter account): http://www.philome.la/
It is just a case of uploading the archive file that you saved earlier.
Once complete your players can access your game from web browsers, tablets or mobile phones. Or if you prefer you can install it permanently on a screen in your gallery.