Install the NFC Tour Guide Application
It’s nearly time to get it all up and running. Firstly we need to install the NFC TourGuide Application. You can find a link to it here:
https://play.google.com/store/apps/details?id=com.museumgames.nfctourguide
If you’re installing from the Play Store on the device then search for: ‘NFC Tour Guide’ and make sure the developer is me: Museum Games 🙂
NFC Tour Guide Android Application
It’s testing time
Install your NFC tags in your test environment (this might just be placing them on the desk – or sticking them up around the room).
Now it’s simply a case of launching the application – look for the ‘Museum Games’ logo.
The NFC reader is on the rear of the Nexus 7. You just need to hold the rear of the Nexus 7 near to the card to trigger the action.
Scan an NFC tag with your device and see if the correct content pops up on the screen. It should be almost instant and you can switch back and forth between cards immediately.
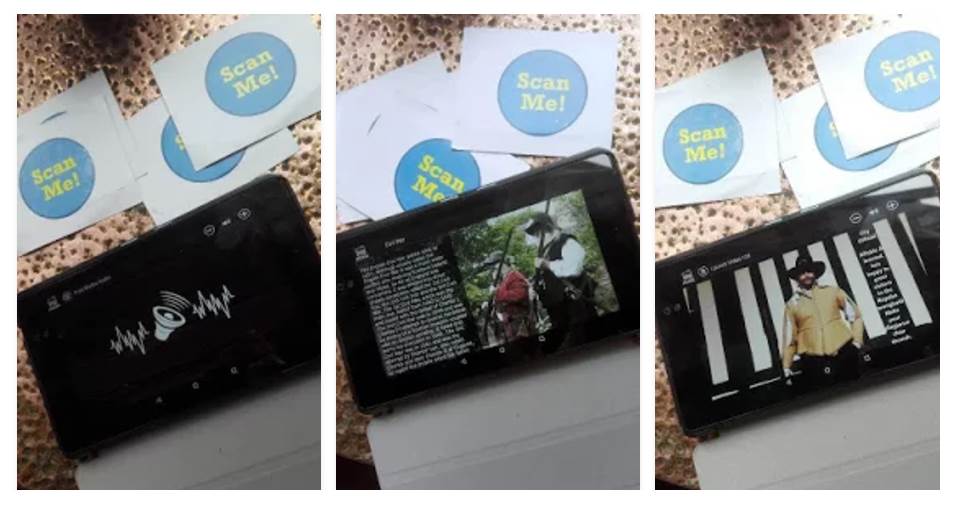
NFC Tour Guide In Operation – with printed labels
That’s it – job done. A super simple magical NFC triggered museum guide. Did we live up to the promises I made back at the beginning?
Create your own tour
So, now you’ve understood the basics it’s completely up to you what kind of tour you’d like to make. It’s a case of:
- Creating your content (audio, video, images)
- Copying this content onto the device
- Creating new NFC tags
- Placing the NFC tags in your museum
You might decide to focus on just one type of content. Perhaps you’d like to build an ordered tour where visitors are directed to the next location or you might want users to do it in any order. The final section discusses some of the advanced ideas.
Thanks for taking the time to follow this all the way through. I do genuinely hope that you manage to build your own version for your museum and I would love to hear about what you’ve managed to build – so please do get in contact!