Introduction
I never really bothered with an audio tutorial as I generally pointed museums to existing youtube ones. However, when I demonstrate this process in person I do it quite differently – so figured it was high-time I created a tutorial more targeted to museums.
As you have probably gathered from the other tutorials on here I love using audio in my projects. Compared with other media – it’s cheap to do, quick to work with and allows the visitor to still engage with the gallery. For me, audio absolutely enhances a space while not providing too big a distraction.
You may use audio for:
- Audio tours such as Babbling Beasts
- Read aloud text panels
- Use in games – such as Museum Escape Games
- Oral histories for interactive touchscreens
I’m not going to dwell on Oral histories as this is as much down to the interview style (and so outside of the limits of this tutorial). I am going to assume that you have some audio that you want to record. Possibly a script or something that you are talking about on the fly.
The Recording Process
You don’t need to spend a lot on this. We have used audio in commercial projects that was recorded on a budget mobile phone. If you managed to record in a quiet room and are prepared to spend some time editing then the end user probably won’t notice the difference. We are mostly recording speech and mobile phones have been developed to create decent quality voice calls.
Having said that a budget microphone is going to improve things. Even plugging in a headset with microphone into your phone will mean that we’re better positioned to record the audio.
(Note: these are non-referral links to Amazon – they direct to smile.amazon.co.uk – so referral fees of 0.5% go to your own chosen charity)
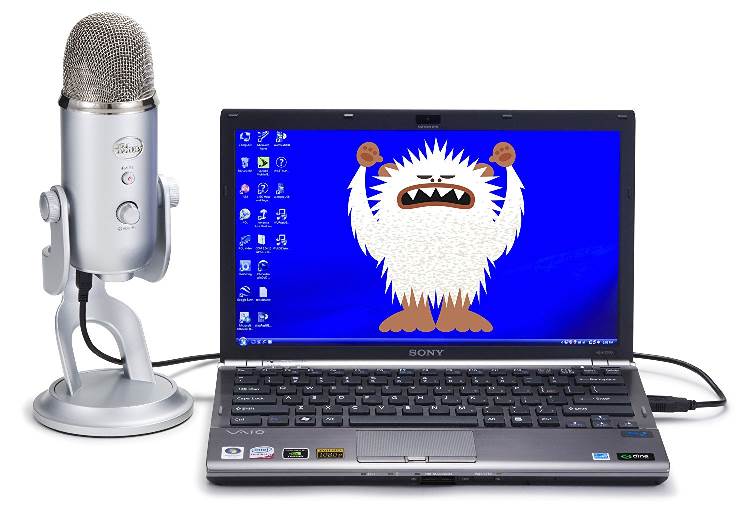
A bit more money and you can use the microphones that is very popular with the podcasters community.
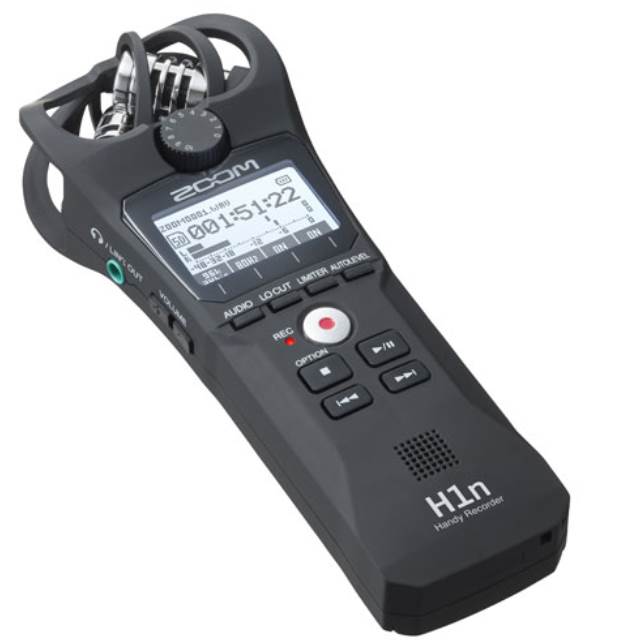
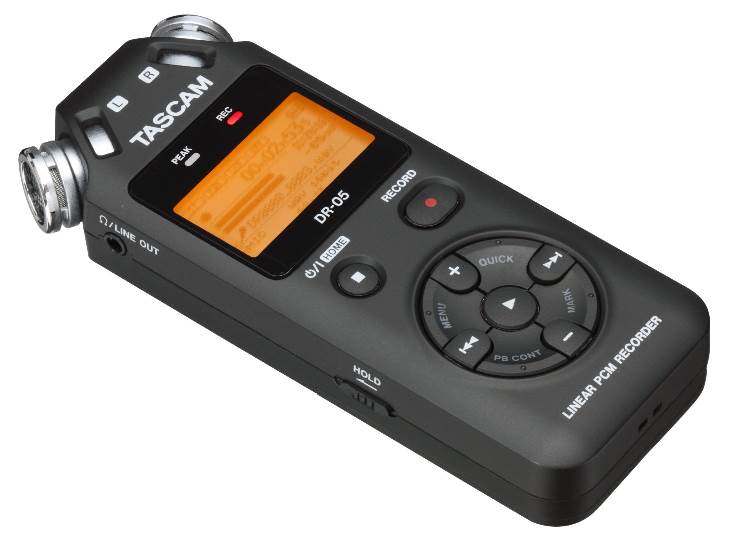
Or you can buy a portable recorder for under £100 such as:
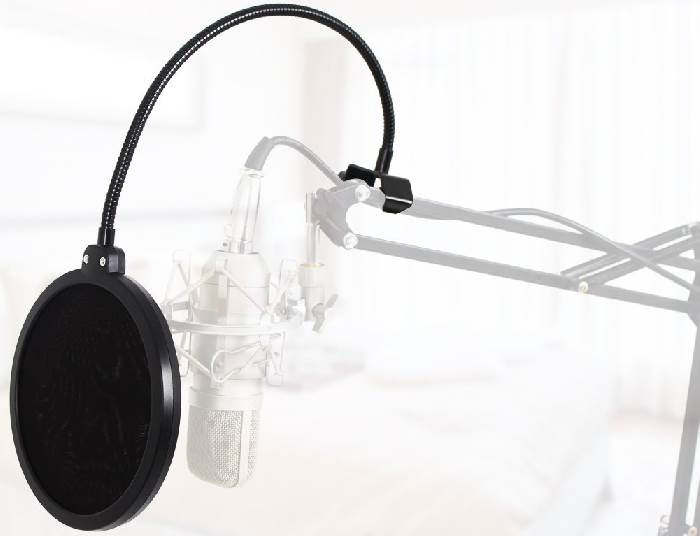
In addition – some kind of pop filter / shield will improve the recording of ‘B’ or ‘P’ sounds which cause the speaker to expel a short blast of air. It can end up sounding like a thump on the microphone and is fairly hard to edit out. The one in the diagram is designed to be attached to a desk – there are portable ones too if needed.
The Free Software: Audacity
We’ll be working with Audacity a fantastic and free audio editing package. It’s open-source and cross platform and while it might not have the prettiest interface it’s straight-forward to use for basic audio editing.
There’s a couple of steps to go through to install Audacity so I’ve covered that here:
Our Example Audio
So we’re going to process a short audio clip. It is taken from an audio tour project from Weston Super Mare museum. The voice actor was a volunteer who has done a fantastic job. There’s still some tidying up we can do to make it sound more professional. This is a relatively simple task as the input quality is very good. As I describe later you might have to work a fair be harder than this.
So this is what the input audio sounds like:
The Basic Process we’ll cover is:
- Remove unwanted noises at the beginning and end of the recording
- Amplify the volume so that it sounds better on playback equipment
- Remove background noise
- Remove actor breathing
- Adjust timing between sentence fragments
- Book-end with beginning / end sound effects
I’ve broken it down into 3 short videos. It’s a bit of an experiment to using videos with a voiceover for my tutorials – but as this is an audio tutorial there’s no other way around it really. If it works I might go back and record more videos for the other tutorials.
Part 1 – Remove unwanted noises and Amplify
Part 2 – Remove background noise and actor breathing
Part 3 – Book-end with additional sound effects
The finished article
I guess the big question is whether you actually notice the difference between our starting point and now we’ve finished processing it. Obviously it’s louder and has the sound effects at the beginning and end. Hopefully, it at least feels more polished and professional than the original piece.
Advanced: Using multiple source recordings
There’s lots of ways to get the best from your voice actors. In a recording studio you’d have a director of sorts making sure that everything is word perfect. You’d get the actor to revisit bits and try with different emphasis and style.
Often I’m not fortunate to set up a recording studio or even being in the same room as the voice actors. So my cheat is to ask for the scripts to be recorded multiple times. I find that 3 is the ideal number (as it is for just about everything in life!).
Normally you can discard the first one – as it serves as a practice run and then I assemble a very good audio piece by combining the best bits of recording 2 and 3.
To do this I open the tracks above each other in audacity and pick out my preference from each audio segment. It’s not completely perfect but it’s served me well for the budget DIY version.
What Next
So now you can use this sound file in a variety of other tutorials. It’s ideal for Babbling Beasts, Interactive Touchscreens, Museum Digital Tour Guides or Escape Games.